 English
- English
-
 Español
 -
 Português
 -
 русский
 -
 Français
 -
 日本語
日本語 -
 Deutsch
 -
 tiếng Việt
 -
 Italiano
 -
 Nederlands
 -
 ภาษาไทย
 -
 Polski
 -
 한국어
한국어 -
 Svenska
 -
 magyar
 -
 Malay
Malay -
 বাংলা ভাষার
 -
 Dansk
Dansk -
 Suomi
Suomi -
 हिन्दी
 -
 Pilipino
 -
 Türkçe
 -
 Gaeilge
 -
 العربية
 -
 Indonesia
 -
 Norsk
Norsk -
 تمل
تمل -
 český
český -
 ελληνικά
 -
 український
 -
 Javanese
 -
 فارسی
فارسی -
 தமிழ்
தமிழ் -
 తెలుగు
 -
 नेपाली
 -
 Burmese
 -
 български
 -
 ລາວ
ລາວ -
 Latine
 -
 Қазақша
 -
 Euskal
 -
 Azərbaycan
 -
 Slovenský jazyk
 -
 Македонски
 -
 Lietuvos
 -
 Eesti Keel
 -
 Română
 -
 Slovenski
 -
 मराठी
मराठी -
 Srpski језик
 -
 Esperanto
 -
 Afrikaans
 -
 Català
 -
 שפה עברית
 -
 Cymraeg
 -
 Galego
 -
 Latviešu
 -
 icelandic
 -
 ייִדיש
 -
 беларускі
 -
 Hrvatski
 -
 Kreyòl ayisyen
 -
 Shqiptar
 -
 Malti
Malti -
 lugha ya Kiswahili
 -
 አማርኛ
አማርኛ -
 Bosanski
 -
 Frysk
Frysk -
 ភាសាខ្មែរ
 -
 ქართული
 -
 ગુજરાતી
 -
 Hausa
Hausa -
 Кыргыз тили
 -
 ಕನ್ನಡ
ಕನ್ನಡ -
 Corsa
Corsa -
 Kurdî
Kurdî -
 മലയാളം
 -
 Maori
Maori -
 Монгол хэл
 -
 Hmong
Hmong -
 IsiXhosa
 -
 Zulu
Zulu -
 Punjabi
 -
 پښتو
پښتو -
 Chichewa
 -
 Samoa
Samoa -
 Sesotho
 -
 සිංහල
සිංහල -
 Gàidhlig
 -
 Cebuano
 -
 Somali
 -
 Тоҷикӣ
 -
 O'zbek
 -
 Hawaiian
 -
 سنڌي
سنڌي -
 Shinra
 -
 Հայերեն
 -
 Igbo
Igbo -
 Sundanese
 -
 Lëtzebuergesch
 -
 Malagasy
 -
 Yoruba
 -
 简体中文
简体中文 -
 繁体中文
繁体中文


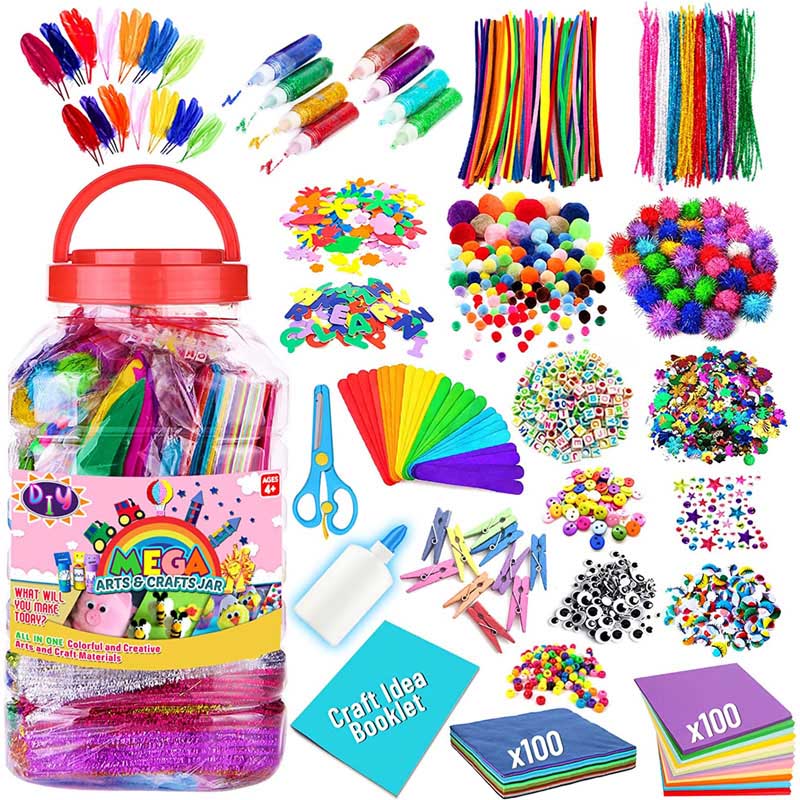
How do you make a collage for kids project?
Creating a collage for a kids' project can be a fun and creative activity.
Gather a variety of materials such as colored paper, magazines, newspapers, fabric scraps, ribbons, buttons, feathers, beads, glitter, sequins, and any other craft materials you have on hand.
Child-safe scissors or regular scissors with supervision.
Stick glue, glue sticks, or liquid glue can work.
Choose a sturdy base material like cardboard, poster board, or thick paper to create the foundation for the collage.
Optional for adding drawings or additional embellishments.
Paints, brushes, stencils, and other decorative items.
Decide on a theme for the collage. It could be anything from animals, nature, space, fantasy, or even a specific topic they're interested in.
Lay out all the materials you've gathered on a table or workspace. Organize them by type or color to make it easier for kids to find what they need.
Use scissors to cut out shapes or images from magazines, colored paper, or fabric scraps. Encourage kids to experiment with different shapes and sizes. They can also tear paper for a textured look.
Before gluing anything down, encourage kids to arrange the cut-out pieces on the base material. They can try different compositions until they're happy with the layout. This step allows them to use their creativity and imagination.
Once they're satisfied with the arrangement, it's time to glue the pieces onto the base material. Remind them to apply glue to the back of each piece and press it firmly onto the base to ensure it sticks.
Kids can add additional details using markers, crayons, or paints. They can draw designs, add borders, or write captions to enhance their collage.
Allow the collage to dry completely before handling or displaying it. This ensures that all the pieces are securely attached.
Once the collage for kids is dry, they can further embellish it with glitter, sequins, stickers, or any other decorative items they like.
Once the collage for kids is complete, it's ready to be displayed proudly on a wall or given as a gift to family and friends.
Encourage creativity and experimentation throughout the process, and remember to have fun!
Send Inquiry


X
We use cookies to offer you a better browsing experience, analyze site traffic and personalize content. By using this site, you agree to our use of cookies.
Privacy Policy